
Paneer Pasanda is a rich and flavorful North Indian dish that exudes royalty in every bite. Popular in Indian restaurants and perfect for special occasions, this creamy and mildly spiced curry features stuffed paneer slices cooked in a silky, aromatic gravy. The word “Pasanda” translates to “favorite,” and true to its name, Paneer Pasanda is a favorite among vegetarians and paneer lovers alike.
In this detailed guide, we’ll explore everything you need to know about Paneer Pasanda, from its ingredients and cooking process to useful tips and variations. By the end of this post, you’ll be able to make this restaurant-style dish right in your kitchen!
What is Paneer Pasanda?
Paneer Pasanda is a unique paneer dish made with paneer triangles stuffed with a rich mixture of dry fruits, spices, and sometimes khoya (reduced milk). These stuffed paneer slices are shallow-fried and then simmered in a luscious, creamy gravy made from onions, tomatoes, and aromatic spices. The result is an indulgent dish that’s perfect for parties, festivals, or any special gathering.
Ingredients for Paneer Pasanda Recipe
For Stuffed Paneer:
- Paneer: 200 grams, cut into thick slices, then halved into triangles
- Filling: Finely chopped cashews, raisins, almonds, grated paneer, and khoya (optional)
- Spices: Salt, red chili powder, garam masala
- Cornflour or All-Purpose Flour (Maida): For coating the paneer slices before frying
- Oil: For shallow frying
For the Gravy:
- Onions: 2 large, roughly chopped
- Tomatoes: 3 large, pureed
- Ginger-Garlic Paste: 1 tablespoon
- Green Chilies: 2, finely chopped
- Spices: Turmeric powder, cumin seeds, red chili powder, garam masala, coriander powder
- Cashew Paste: 10-12 cashews soaked and blended into a smooth paste
- Fresh Cream: 2-3 tablespoons
- Kasuri Methi (Dried Fenugreek Leaves): 1 teaspoon
- Butter and Oil: For cooking
- Salt and Sugar: To taste
- Fresh Coriander Leaves: For garnish
How to Make Paneer Pasanda: Step-by-Step Process
Step 1: Preparing the Stuffed Paneer
Slice the Paneer: Begin by cutting 200 grams of paneer into thick slices. Next, carefully halve each slice diagonally to form triangles.
Prepare the Filling: In a small bowl, combine finely chopped dry fruits (such as cashews, raisins, and almonds), grated paneer, and khoya (if using). Add a pinch of salt and garam masala to taste. Mix until everything is well combined.
Stuff the Paneer: Using a sharp knife, gently make a slit in the middle of each paneer triangle, creating a pocket. Carefully fill each pocket with the prepared stuffing mixture, ensuring it’s evenly filled but not overstuffed.
Coat and Fry the Paneer: Lightly dust the stuffed paneer triangles with cornflour or maida to coat them. Heat oil in a pan over medium heat and shallow-fry the triangles until they turn golden brown on both sides. Once done, set them aside on a paper towel to drain excess oil.
Step 2: Making the Gravy
Sauté the Onions: In the same pan, add a tablespoon of butter and a little oil. Once heated, add cumin seeds and let them crackle. Toss in 2 large, roughly chopped onions, and sauté until they become golden brown.
Add Ginger, Garlic, and Chilies: Stir in a tablespoon of ginger-garlic paste along with 2 finely chopped green chilies. Cook for a few minutes until the raw aroma disappears.
Cook the Tomatoes: Add the puree made from 3 large tomatoes to the pan. Season with turmeric powder, red chili powder, coriander powder, and salt. Stir well and cook until the oil starts to separate from the tomato mixture, signaling that the masala is cooked.
Blend in Cashew Paste: Blend 10-12 soaked cashews into a smooth paste. Add this to the pan and continue cooking for a few minutes, stirring to ensure the mixture doesn’t stick to the bottom of the pan.
Creamy Finish: Lower the heat and pour in 2-3 tablespoons of fresh cream. Mix well, and sprinkle in a teaspoon of kasuri methi to enhance the flavor. Add water as needed to adjust the consistency of the gravy to your liking. Let it simmer for 5-7 minutes until the gravy thickens to a silky, smooth texture.
Step 3: Assembling the Dish
Add the Fried Paneer: Gently place the shallow-fried, stuffed paneer triangles into the simmering gravy. Stir gently, ensuring the paneer is well-coated with the gravy. Let it simmer for 3-4 minutes to absorb the flavors.
Final Touch: Taste the gravy and adjust the seasoning if needed. Garnish the dish with freshly chopped coriander leaves and, for an extra touch of richness, drizzle some more cream on top.
Serving Suggestions
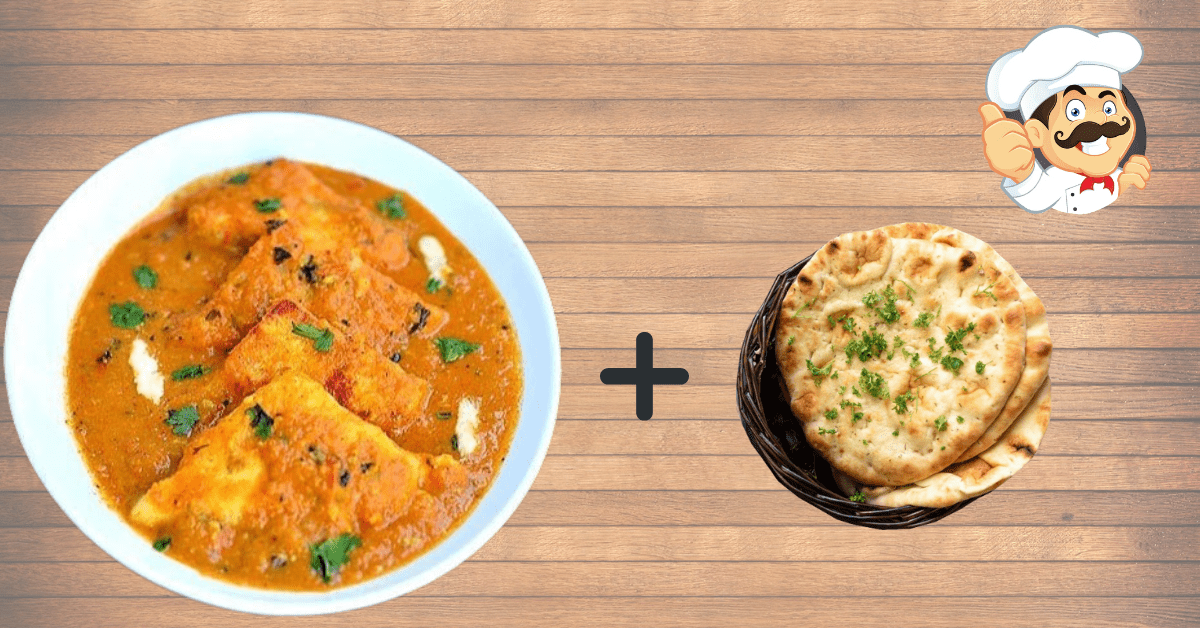
Serve the Paneer Pasanda hot alongside soft naan, flaky parathas, or fragrant jeera rice. For a complete meal, you can also pair it with a fresh salad or cooling raita.
Cooking Time:
- Preparation Time: 20 minutes
- Cooking Time: 30 minutes
- Total Time: 50 minutes
Nutrition Information (Per Serving):
- Calories: 375 kcal
- Protein: 12g
- Carbohydrates: 20g
- Fat: 28g
- Fiber: 2g
This recipe yields 4 servings and provides a balanced mix of fats, protein, and carbohydrates, making it a satisfying dish for special occasions.
Tips and Tricks for Perfect Paneer Pasanda
- Soft Paneer: Always use fresh and soft paneer for the best texture. If store-bought paneer is hard, soak it in warm water for 15 minutes before using.
- Smooth Gravy: Blend the onion-tomato mixture into a fine paste if you prefer a smoother gravy.
- Flavorful Stuffing: You can customize the stuffing by adding grated cheese, herbs, or even some finely chopped green chilies for a spicier version.
- Avoid Overcooking: Once the stuffed paneer triangles are added to the gravy, avoid overcooking as they can become chewy.
- Balancing Flavors: If the gravy turns out too tangy due to the tomatoes, add a pinch of sugar or honey to balance the flavors.
Variations of the Paneer Pasanda Recipe
- Paneer Pasanda without Stuffing: If you’re short on time, skip the stuffing and use plain paneer slices instead. The rich gravy will still taste amazing.
- Vegan Version: Replace paneer with tofu and use coconut milk or cashew cream instead of dairy cream for a vegan-friendly dish.
- Restaurant-Style Paneer Pasanda: For a restaurant-style finish, add a dash of saffron-soaked milk to the gravy.
Why You Should Try Paneer Pasanda
Paneer Pasanda is a versatile dish that perfectly balances richness, creaminess, and mild spices. It’s a dish that can impress guests and make any occasion memorable. Despite its luxurious taste, it’s surprisingly easy to make at home with basic ingredients found in most Indian kitchens.
The combination of stuffed paneer, creamy gravy, and aromatic spices creates an indulgent dish that’s worth every bite. Whether you’re cooking for a festival, a family gathering, or simply want to treat yourself, Paneer Pasanda is a must-try.
Final Thoughts
Paneer Pasanda is a royal dish that combines the richness of stuffed paneer with a delectable gravy, making it a standout in North Indian cuisine. With the right ingredients and a few simple steps, you can recreate this restaurant-style dish in your own kitchen. Give this recipe a try and experience the deliciousness of Paneer Pasanda, a dish that truly lives up to its name – “Pasanda” or “favorite.”
What is recommended to serve with Paneer Pasanda?
Paneer Pasanda goes wonderfully with naan, paratha, or jeera rice. For a well-rounded meal, you can also serve it alongside raita or a fresh salad.
How spicy is Paneer Pasanda?
Paneer Pasanda is generally mildly spiced. Feel free to adjust the spice level by adding extra chili powder or green chilies to suit your taste.
What should we do if the gravy turns out too thick?
If the gravy is too thick, you can add a little water or milk to reach your desired consistency. Stir well and simmer for a few minutes to blend the flavors.
How do we make the paneer stuffing?
The stuffing usually includes finely chopped dry fruits like cashews, almonds, and raisins, along with some grated paneer and spices. Mix these ingredients and fill the paneer slices before frying.