
Methi Paratha, a traditional Indian flatbread made with fresh fenugreek leaves, is not just a treat for your taste buds but also a powerhouse of nutrition. In this in-depth guide, I’ll walk you through the step-by-step process of the flavorful Methi Paratha Recipe, discuss its health benefits, and answer common questions you might have. Whether you’re a seasoned cook or a beginner in the kitchen, this recipe is perfect for you.
Health Benefits
Before we dive into the methi paratha recipe, let’s talk about why it should be a staple in your kitchen. Fenugreek leaves, or methi, are packed with vitamins, minerals, and fiber, making them incredibly beneficial for your health. They are known to improve digestion, lower cholesterol levels, and regulate blood sugar. Plus, the combination of whole wheat flour and methi in this paratha provides a balanced meal that keeps you full for longer.
What Makes Methi Paratha Special
Methi Paratha is a versatile dish that can be enjoyed for breakfast, lunch, or dinner. It pairs well with yogurt, pickles, or a simple curry. The slightly bitter taste of methi, balanced with aromatic spices, makes this paratha a unique and delicious addition to your meal plan.
Essential Ingredients for the Perfect Methi Paratha Recipe
Before we start, make sure you have all the ingredients on hand. Here’s what you’ll need:
- Fresh Methi Leaves (Fenugreek): 1 cup, washed and chopped
- Whole Wheat Flour (Atta): 2 cups
- Carom Seeds (Ajwain): 1 teaspoon
- Cumin Seeds (Jeera): 1 teaspoon
- Turmeric Powder (Haldi): ½ teaspoon
- Red Chili Powder: ½ teaspoon (optional)
- Garam Masala: ½ teaspoon
- Salt: to taste
- Ghee or Oil: for cooking
- Water: as needed to knead the dough
Cooking Time:
- Preparation Time: 15 minutes (kneading the dough, prepping ingredients)
- Cooking Time: 25 minutes (for making the parathas)
- Total Time: 40 minutes
How to Select the Best Methi Leaves
When buying methi leaves, look for bright green, tender leaves without any yellow spots or wilting. Fresh methi leaves will have a slightly bitter taste, which adds a unique flavor to the paratha. If fresh methi is not available, you can use dried methi leaves (kasuri methi), but reduce the quantity as dried leaves have a more concentrated flavor.
Step-by-Step Methi Paratha Recipe: From Kneading to Cooking
Now, let’s dive into the step-by-step process of making Methi Paratha. Follow these detailed instructions to ensure your parathas turn out perfect every time.
Step 1: Preparing the Dough
- Wash and Chop Methi Leaves: Start by washing the methi leaves thoroughly to remove any dirt. Chop them finely and set aside.
- Mix the Dry Ingredients: In a large mixing bowl, combine the whole wheat flour, carom seeds, cumin seeds, turmeric powder, red chili powder (if using), garam masala, and salt.
- Incorporate the Methi Leaves: Add the chopped methi leaves to the flour mixture. Mix well so that the leaves are evenly distributed.
- Knead the Dough: Gradually add water to the flour mixture and start kneading to form a soft dough. The dough should be pliable but not too sticky. If it feels too dry, add a little more water; if too sticky, add a bit more flour.
- Rest the Dough: Once the dough is ready, cover it with a damp cloth and let it rest for about 10-15 minutes. This helps the dough to soften, making it easier to roll out the parathas.
Step 2: Rolling Out the Parathas
- Divide the Dough: After resting, divide the dough into equal-sized balls, approximately the size of a golf ball.
- Flatten the Dough Balls: Take one dough ball and flatten it slightly between your palms.
- Roll the Paratha: Dust the flattened dough with a little flour and roll it out into a circle, about 6-7 inches in diameter. The thickness should be even to ensure uniform cooking.
Step 3: Cooking the Parathas
- Heat the Tawa (Griddle): Place a tawa or griddle on medium heat. Once hot, place the rolled-out paratha on it.
- Cook on Both Sides: Cook the paratha for about 1-2 minutes until you see bubbles forming on the surface. Flip it over and cook the other side.
- Apply Ghee or Oil: Once both sides are partially cooked, apply a small amount of ghee or oil on each side and press lightly with a spatula. Cook until both sides are golden brown and crispy.
- Repeat the Process: Repeat the process for the remaining dough balls.
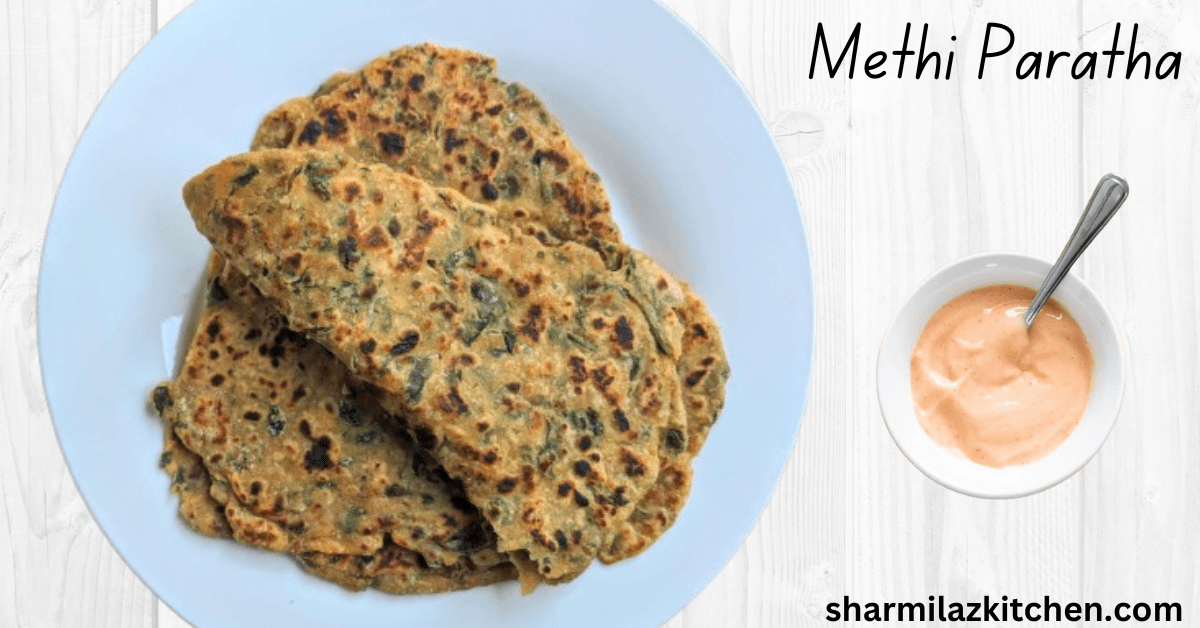
- Serve Hot: Serve the Methi Parathas hot with yogurt, pickle, or your favorite curry.
Pro Tips for Perfect Methi Paratha Recipe
- Consistency of Dough: Ensure that your dough is soft and pliable. A stiff dough will make rolling difficult and the parathas might turn out hard.
- Even Rolling: Try to roll the paratha evenly to ensure it cooks uniformly. Uneven rolling can lead to undercooked or overcooked spots.
- Cooking Temperature: Keep the tawa at a medium heat. If it’s too hot, the parathas will burn on the outside and remain uncooked inside. If it’s too low, the parathas might turn out dry.
Delicious Variations of Methi Paratha
1. Methi Aloo Paratha
For a heartier version of the classic Methi Paratha, try adding mashed potatoes to the dough. Methi Aloo Paratha combines the earthy flavor of fenugreek leaves with the comforting taste of spiced potatoes. The addition of aloo makes this paratha extra filling and perfect for a satisfying breakfast or lunch. Serve it with a side of tangy yogurt and pickle for a complete meal.
2. Cheese-Stuffed Methi Paratha Recipe
If you’re looking to add a little indulgence to your meal, try making Cheese-Stuffed Methi Paratha. The creamy, melted cheese pairs wonderfully with the slightly bitter methi, creating a delicious balance of flavors. This variation is a hit with kids and adults alike. Enjoy it hot, straight off the tawa, with a dollop of butter or a drizzle of ghee.
3. Methi Paneer Paratha
For a protein-packed variation, incorporate grated paneer into your Methi Paratha dough. Methi Paneer Paratha is rich in flavor and nutrition, making it an excellent choice for a wholesome meal. The soft paneer adds a creamy texture, while the methi leaves bring in a burst of fresh, green flavor. This paratha pairs beautifully with mint chutney or a tomato-based curry.
4. Spicy Methi Paratha Recipe
If you enjoy a bit of heat in your meals, the Spicy Methi Paratha is the perfect choice. By adding extra green chilies, red chili powder, and spices like garam masala or chaat masala to the dough, you can create a paratha with a fiery kick. This version is ideal for those who love bold flavors. Serve it with a cooling raita to balance the spice.
5. Methi and Mixed Vegetable Paratha
For a nutrient-dense option, try the Methi and Mixed Vegetable Paratha. Incorporate finely chopped vegetables like carrots, spinach, and bell peppers into the dough along with methi leaves. This variation is not only colorful but also packed with vitamins and minerals, making it a great choice for a healthy, balanced meal. Pair it with a simple dal or a side salad.
Nutrition (Per Serving):
- Calories: 267 kcal
- Carbs: 42g
- Protein: 6g
- Fat: 8g
- Fiber: 6g
Final Thoughts
Methi Paratha is more than just a tasty dish; it’s a nutritious meal that brings together the goodness of whole wheat and the health benefits of methi leaves. Whether you’re making it for breakfast, lunch, or dinner, this paratha is sure to satisfy your cravings while keeping your health in check. The next time you’re looking for a quick, healthy, and delicious meal, give this methi paratha recipe a try. You won’t be disappointed!
Can I make Methi Paratha without oil or ghee?
Yes, you can make methi paratha without oil or ghee, but they might not be as soft. If you’re watching your calorie intake, you can skip the ghee or use a non-stick pan to cook them.
Can I freeze the dough for later use?
Yes, you can freeze the dough. Wrap it in plastic wrap and store it in an airtight container. When you’re ready to use it, let it thaw at room temperature before rolling out the parathas.
What can I serve with Methi Paratha?
Methi paratha pairs well with yogurt, pickle, and any curry. You can also serve it with a side of dal or a chutney of your choice.
Can I Use Dried Methi Leaves?
Yes, you can use dried methi leaves, known as kasuri methi. However, since dried leaves have a stronger flavor, use about 1/3 of the amount you would use for fresh leaves. Soak the dried leaves in warm water for a few minutes before adding them to the dough.
Is Methi Paratha Good for Diabetics?
Methi paratha can be a good option for diabetics as fenugreek leaves help in regulating blood sugar levels. However, it’s essential to control portion sizes and avoid using too much oil or ghee.
How long does it take to cook Methi Paratha?
On average, it takes about 3-4 minutes to cook each Methi Paratha on a tawa. This includes about 1-2 minutes per side, plus a little extra time for applying ghee or oil and ensuring that both sides are golden brown and crispy. So, if you’re making multiple parathas, plan accordingly!
How Do I Store Leftover Parathas?
If you have leftover parathas, let them cool completely before storing them in an airtight container. You can refrigerate them for up to 2 days. To reheat, simply warm them on a tawa or in a microwave.